Ignition Coil
| 1. |
Remove the engine
cover. |
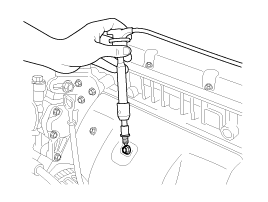
| 2. |
Disconnect the ignition coil
connector(A).

|
When removing the ignition coil
connector, pull the lock pin(A) and push the
clip(B). |

|
| 3. |
Remove the ignition coil
(B). |
| 4. |
Installation is the reverse of
removal. |
| 1. |
Remove the ignition coil
connector(A).
|
| 2. |
Remove the ignition
coil(B). |
| 3. |
Using a spark plug socket, remove the spark
plug. |
| 4. |
Install the spark plug to the ignition
coil. |
| 5. |
Ground the spark plug to the
engine.
|
| 6. |
Check if spark occurs while engine is being
cranked.
|
To prevent fuel being injected from
injectors while the engine is being cranked, remove the fuel
pump(A) relay from the fuse box.
Crank the engine for no more than 5 ~ 10
seconds. |

|
| 7. |
Inspect all the spark
plugs. |
| 8. |
Using a spark plug socket, install the spark
plug. |
| 9. |
Install the ignition
coil. |
| 10. |
Reconnect the ignition coil
connector. |

Inspect Spark Plug
| 1. |
Remove the ignition coil
connector(A).
|
When removing the ignition coil
connector, pull the lock pin(A) and push the
clip(B). |
|
| 2. |
Remove the ignition
coil(B). |
| 3. |
Using a spark plug socket, remove the spark
plug.
|
Be careful that no contaminates enter
through the spark plug
holes. | |
| 4. |
Inspect the electrodes (A) and ceramic
insulator (B).

Inspection Of Electrodes
Condition
|
Dark
deposits
|
White
deposits
|
Description
|
|
| -
|
Advanced ignition
timing |
| -
|
Insufficient plug tightening
torque | |
|
| 5. |
Check the electrode gap (A).
Standard
:
1.0 ~ 1.1 mm (0.0394 ~ 0.0433
in.)
|

|
Inspect Ignition Coil
| 1. |
Measure the primary coil resistance between
terminals (+) and (-).

Standard
value: 0.62Ω ± 10%
| | |